Navigating the Digital Seas with Scanning & Enumeration! 🕵️♀️🔍 (Part 2)

Welcome back, cybersecurity adventurers! 👋 In Part 1 of our “Scanning & Enumeration” journey, we learned to put on our digital detective hats, understand the different types of scanning, and map out the digital landscape using network discovery and various port scanning techniques with our trusty Nmap.
Now, it’s time to dig deeper! Knowing which ports are open is great, but what’s running on them? How can we tell what operating system the target is using? And how do we move from a basic scan to a full-blown vulnerability assessment?
In this second part, we’ll dive into the exciting world of service enumeration, OS fingerprinting, automated vulnerability scanning, and mastering the art of analyzing results. We’ll also touch upon some advanced evasion techniques and how to prioritize your targets. Let’s continue our quest for digital knowledge! 🚀
Key Terms & Definitions 📖
Before we dive in, let’s clarify some important terms:
- Enumeration: The process of extracting detailed information about services, users, directories, shares, and other resources from a target system.
- Banner: A text string that a service sends when a connection is established, often revealing version information.
- Fingerprinting: The technique of identifying specific characteristics (like OS or service versions) by analyzing response patterns.
- CVE (Common Vulnerabilities and Exposures): A standardized identifier for publicly known cybersecurity vulnerabilities.
- CPE (Common Platform Enumeration): A standardized naming scheme for IT systems, platforms, and packages.
- False Positive: When a security tool incorrectly identifies something as a vulnerability when it isn’t.
- IDS/IPS: Intrusion Detection System (monitors and alerts) / Intrusion Prevention System (monitors and blocks).
1. Service Enumeration: What’s Behind the Open Doors? 🚪👀
You’ve found the open doors (ports) on a target host. Now, it’s time to peek inside and see what services are running behind them. This phase, called Service Enumeration, is about gathering detailed information about these services. Knowing the exact service name and version (e.g., Apache HTTP Server version 2.4.7, OpenSSH 6.6.1p1) is a goldmine because specific versions often have publicly known vulnerabilities!
1.1 Banner Grabbing: The Quick Hello 👋

The simplest form of service enumeration is banner grabbing. Many network services, when a connection is initiated, will send a “banner” – a short string of text that often includes the service name, version, and sometimes even the operating system.
Think of it like knocking on a door, and someone shouts “Hello, I’m Bob, and I’m 45 years old!” from inside.
How it Works: You simply connect to the port, and the service sends its banner.
Tools: You can use simple tools like netcat (often aliased as nc) or even curl for web services. Nmap also performs banner grabbing during its version detection scans.
Examples:
1
2
3
4
5
6
7
8
9
10
11
12
# Using netcat to grab an HTTP banner
nc -v target.com 80
# Then type: GET / HTTP/1.0 (and press Enter twice)

# Using netcat to grab an SSH banner
nc -v target.com 22

# Using curl for web services
curl -v target.com

# Using telnet (another option)
telnet target.com 80
Sample Output (Netcat to port 80):
1
2
3
4
5
6
7
Connection to target.com 80 port [tcp/http] succeeded!
HTTP/1.1 200 OK
Date: Wed, 25 Jun 2025 10:00:00 GMT
Server: Apache/2.4.7 (Ubuntu)
Last-Modified: Tue, 01 May 2025 12:00:00 GMT
Content-Length: 1234
Content-Type: text/html
From this, you immediately know the server is Apache/2.4.7 (Ubuntu). This is a crucial piece of information!
⚠️ Important Note: Some services won’t send banners automatically. For HTTP, you need to send a request (like GET / HTTP/1.0) to get a response.
1.2 Nmap for Deeper Service & Version Detection 🕵️♂️
While banner grabbing is a good start, Nmap’s service and version detection (-sV) goes much further. It sends a series of probes to open ports and analyzes the responses to accurately determine the service and its version. It’s like having a detailed conversation to learn everything about “Bob.”
How it Works: Nmap has a vast database of service signatures (stored in nmap-service-probes). It sends various “test” packets designed to elicit specific responses from different services, then matches those responses to its database.
Why it Matters: This is critical! If you find Apache 2.4.7, you can then search for “Apache 2.4.7 vulnerabilities” on databases like CVE (Common Vulnerabilities and Exposures) or exploit databases like ExploitDB to find known weaknesses.
Version Intensity Levels:
1
2
3
4
5
6
7
8
9
10
11
# Default version detection
nmap -sV 192.168.1.100

# Light version detection (faster, less accurate)
nmap -sV --version-light 192.168.1.100

# Intense version detection (slower, more accurate)
nmap -sV --version-all 192.168.1.100

# Specify version intensity (0-9, default is 7)
nmap -sV --version-intensity 9 192.168.1.100
Sample Output:
1
2
3
4
5
PORT   STATE SERVICE VERSION
21/tcp open  ftp     vsftpd 3.0.3
22/tcp open  ssh     OpenSSH 7.2p2 Ubuntu 4ubuntu2.8 (Ubuntu Linux; protocol 2.0)
80/tcp open  http    Apache httpd 2.4.18 ((Ubuntu))
Service Info: OSs: Unix, Linux; CPE: cpe:/o:linux:linux_kernel
This output is incredibly rich! You know the FTP server is vsftpd 3.0.3, the SSH server is OpenSSH 7.2p2, and the web server is Apache 2.4.18. Each of these can be investigated for known vulnerabilities.
1.3 Nmap Scripting Engine (NSE): Automating the Hunt 🏃♀️
The Nmap Scripting Engine (NSE) is a powerful feature that extends Nmap’s capabilities even further. It allows users to write and share scripts to automate a wide variety of tasks, including vulnerability detection, service enumeration, backdoor detection, and even basic exploitation.
Nmap comes with hundreds of pre-written scripts, categorized for easy use.
NSE Script Categories:
| Category | Description | Usage Example |
|---|---|---|
| auth | Authentication related scripts | Testing for default credentials |
| broadcast | Discovery scripts that use broadcast | Finding DHCP servers, SQL servers |
| brute | Brute force scripts for passwords | Password guessing attempts |
| default | Scripts run with -sC | Basic enumeration safe to run |
| discovery | Active discovery beyond port scanning | DNS zone transfers, SNMP enumeration |
| dos | Denial of Service testing scripts | Testing service stability |
| exploit | Active exploitation attempts | Use with extreme caution |
| external | Scripts that contact third-party services | WHOIS lookups, geolocation |
| fuzzer | Fuzzing scripts | Finding buffer overflows |
| intrusive | Scripts likely to crash services or leave logs | Aggressive testing |
| malware | Malware detection scripts | Backdoor detection |
| safe | Scripts unlikely to crash services | Good for production systems |
| version | Version detection enhancement scripts | Improving service detection |
| vuln | Vulnerability detection scripts | Finding known vulnerabilities |
Examples:
1
2
3
4
5
6
7
8
9
10
11
12
13
14
15
16
17
18
19
20
21
22
23
# Run all default scripts (safe and useful)
nmap -sC 192.168.1.100

# Run scripts specifically for HTTP enumeration
nmap --script=http-enum 192.168.1.100

# Run scripts to check for common web vulnerabilities
nmap --script=http-vuln* 192.168.1.100

# Run scripts for SMB enumeration (Windows shares)
nmap --script=smb-enum* 192.168.1.100

# List all available scripts
ls /usr/share/nmap/scripts/

# Get help for a specific script
nmap --script-help http-enum

# Run multiple script categories
nmap --script="safe,discovery" 192.168.1.100

# Exclude intrusive scripts
nmap --script="default and not intrusive" 192.168.1.100
Sample Output (using http-enum):
1
2
3
4
5
6
7
8
9
10
PORT   STATE SERVICE VERSION
80/tcp open  http    Apache httpd 2.4.18 ((Ubuntu))
|_http-server-header: Apache/2.4.18 (Ubuntu)
| http-enum:
|   /admin/: Admin panel
|   /backup/: Backup files
|   /images/: Images directory
|   /robots.txt: Robots exclusion standard
|   /sitemap.xml: Sitemap
|_  /phpmyadmin/: Possible phpMyAdmin installation
This is fantastic! The http-enum script automatically found common web paths, potentially revealing administrative interfaces or sensitive files.
1.4 Protocol-Specific Enumeration Tools 🔧
While Nmap is versatile, sometimes specialized tools provide deeper enumeration:
| Protocol | Tool | Purpose |
|---|---|---|
| HTTP/HTTPS | dirb/dirbuster | Directory and file brute-forcing |
| gobuster | Fast directory/file & DNS busting tool | |
| nikto | Web server vulnerability scanner | |
| wpscan | WordPress vulnerability scanner | |
| SMB/NetBIOS | enum4linux | Enumerates SMB shares, users, groups |
| smbclient | Access SMB/CIFS resources | |
| rpcclient | Execute client-side MS-RPC functions | |
| DNS | dnsrecon | DNS enumeration and scanning |
| dnsenum | DNS enumeration tool | |
| fierce | Domain scanner | |
| SNMP | snmpwalk | Retrieve SNMP data |
| onesixtyone | Fast SNMP scanner |
2. OS Fingerprinting: Guessing the Operating System 💻🤔

Knowing the operating system of your target is incredibly helpful. Different operating systems (Windows, Linux, macOS, various network devices) have different vulnerabilities, security configurations, and common services. OS Fingerprinting is the process of trying to determine the operating system of a remote host.
2.1 Active OS Fingerprinting with Nmap 🧠
Nmap’s OS detection (-O) is the most common and effective way to perform active OS fingerprinting.
How it Works: Nmap sends a series of TCP/IP packets to the target and analyzes subtle differences in how the target responds.
Key OS Indicators:
| Indicator | Description | Example Values |
|---|---|---|
| TCP Initial Window Size | Size of window field in initial TCP SYN packet | Varies by OS |
| TTL Values | Default Time To Live values | Linux: 64, Windows: 128, Cisco: 255 |
| Don’t Fragment Bit | How the target handles DF bit in IP headers | OS-specific behavior |
| TCP Options | Order and presence of various TCP options | MSS, Window Scale, SACK, Timestamps |
| TCP Sequence Number | How predictable the ISN are | Pattern varies by OS |
| IP ID Sequence | Pattern of IP identification field values | Incremental, random, or zero |
Nmap compares these responses to a vast database of OS signatures to make an educated guess.
Example:
1
2
3
4
5
6
7
8
9
10
11
# Perform OS detection (requires root/sudo)
sudo nmap -O 192.168.1.100

# Aggressive OS detection with version detection
sudo nmap -A 192.168.1.100

# Limit OS detection to promising targets
sudo nmap -O --osscan-limit 192.168.1.100

# Guess OS more aggressively
sudo nmap -O --osscan-guess 192.168.1.100
Sample Output:
1
2
3
4
5
6
7
8
9
10
11
12
13
14
15
16
17
18
19
20
21
22
Nmap scan report for 192.168.1.100
Host is up (0.00030s latency).
Not shown: 996 closed ports
PORT     STATE SERVICE
21/tcp   open  ftp
22/tcp   open  ssh
80/tcp   open  http
445/tcp  open  microsoft-ds
Aggressive OS guesses: Linux 3.10 - 4.11 (92%), Linux 4.4 (92%), Linux 4.9 (92%), Linux 4.2 - 4.9 (91%), Linux 4.8 (91%), Linux 4.10 (90%), Linux 4.10 - 4.11 (90%), Linux 4.10 - 4.13 (90%), Linux 4.15 (90%), Linux 4.15 - 4.16 (90%)
No exact OS matches for host (If you know what OS is running on it, see https://nmap.org/submit/ ).
TCP/IP fingerprint:
OS:SCAN(V=7.80%E=4%D=6/25%OT=21%CT=1%CU=42341%PV=Y%DS=2%DC=T%G=Y%TM=5D12
OS:SEQ(SP=103%GCD=1%ISR=10C%TI=Z%CI=Z%II=I%TS=8)
OS:OPS(O1=M54BST11NW7%O2=M54BST11NW7%O3=M54BNNT11NW7%O4=M54BST11NW7%O5=M5
OS:ECN(R=Y%DF=Y%T=40%W=5C74%O=M54BNNSNW7%CC=Y%Q=)
OS:T1(R=Y%DF=Y%T=40%S=O%A=S+%F=AS%RD=0%Q=)
OS:T2(R=N)
OS CPE: cpe:/o:linux:linux_kernel:4.4
Device type: general purpose
Running (JUST GUESSING): Linux 4.X (92%)
OS CPES: cpe:/o:linux:linux_kernel:4.4
...
Nmap provides a confidence percentage (e.g., 92%) for its guesses and often lists multiple possibilities. While not always 100% accurate, it’s a very strong indicator. The CPE (Common Platform Enumeration) information is useful for looking up vulnerabilities.
2.2 Passive OS Fingerprinting 🕵️♀️
Passive fingerprinting analyzes existing network traffic without sending any packets to the target. Tools like p0f can identify OS by observing TCP window sizes, TTL values, TCP options, and HTTP User-Agent strings.
1
2
3
4
5
# Run p0f on interface eth0
sudo p0f -i eth0

# Read from a PCAP file
p0f -r capture.pcap
2.3 Combining with Service Detection for Accuracy 🤝
For the most accurate OS fingerprinting, it’s best to combine it with service detection (-sV -O or just -A for aggressive scan which includes both). Services often reveal specific versions tied to an operating system. For example, finding OpenSSH 7.2p2 Ubuntu strongly suggests a Ubuntu Linux system.
OS Fingerprinting Challenges:
| Challenge | Description | Impact |
|---|---|---|
| Firewalls | May block the special packets needed for OS detection | Reduced accuracy |
| Modified Stack | Custom kernels or hardened systems may not match signatures | False identification |
| Network Devices | Routers, switches, and IoT devices often have unique stacks | Limited signatures |
| Virtualization | VMs may show characteristics of both guest and host OS | Mixed results |
3. Automated Vulnerability Scanning: The “Easy Button” (with a Warning!) 🚨
Once you’ve enumerated services and identified operating systems, you can move on to Automated Vulnerability Scanning. Think of these tools as automated security auditors that compare your target’s configurations and identified services against vast databases of known vulnerabilities.
While powerful, these tools are not a replacement for manual analysis and expertise. They can generate a lot of “noise” (false positives) and might miss subtle, complex vulnerabilities. They are best used as a starting point to identify obvious weaknesses.
3.1 Popular Automated Scanners 🛠️
Open Source Scanners:
| Scanner | Description | Best For |
|---|---|---|
| OpenVAS/GVM | Comprehensive scanner with 50,000+ tests | General vulnerability assessment |
| Nuclei | Fast, template-based vulnerability scanner | Web application testing |
| OWASP ZAP | Web application security scanner | Web app dynamic testing |
| SQLMap | Automated SQL injection tool | Database security testing |
Commercial Scanners:
| Scanner | Vendor | Key Features |
|---|---|---|
| Nessus | Tenable | Industry leader, extensive plugin library |
| Qualys VMDR | Qualys | Cloud-based, continuous monitoring |
| Acunetix | Invicti | Specialized web application scanner |
| Burp Suite Pro | PortSwigger | Web security testing platform |
3.2 How They Work (Simplified) 🤔
1. Discovery Phase: The scanner performs network mapping (like Nmap), port scanning, service detection, and OS fingerprinting.
2. Vulnerability Identification: The scanner uses version-based detection to compare discovered versions against vulnerability databases, performs configuration checks for weak settings (default passwords, unnecessary services), conducts active testing by sending crafted packets to test for specific vulnerabilities, and performs credential testing to check for default/weak credentials.
3. Vulnerability Database Components:
| Component | Description | Example |
|---|---|---|
| CVE Database | Official vulnerability identifiers | CVE-2021-44228 (Log4j) |
| NVD | National Vulnerability Database with detailed info | CVSS scores, patches |
| Vendor Advisories | Direct from software makers | Microsoft Security Bulletins |
| Exploit Databases | Proof-of-concept code | ExploitDB, Metasploit |
4. Reporting: Scanners provide CVSS Scores (Common Vulnerability Scoring System 0-10 scale), risk ratings (Critical, High, Medium, Low, Informational), remediation guidance (patches, workarounds, configuration changes), and compliance mapping (PCI-DSS, HIPAA, ISO 27001, etc.).
Example OpenVAS Scan Process:
1
2
3
4
5
6
7
# Start OpenVAS services
sudo gvm-start

# Access web interface (usually https://localhost:9392)
# Default credentials: admin/admin (change immediately!)

# Create target → Create task → Run scan → View results
Key Takeaways:
Strengths: Quickly identify common vulnerabilities, comprehensive coverage of known issues, consistent and repeatable results, and compliance reporting capabilities.
Weaknesses: High false positive rates, may miss business logic flaws, can crash sensitive services, and requires expertise to interpret results.
Always Verify: Never trust an automated scanner’s output blindly. Always verify critical findings manually to avoid wasting time on false positives.
3.3 Understanding Vulnerability Metrics 📊
CVSS (Common Vulnerability Scoring System) v3.1:
| Score Range | Severity | Action Required |
|---|---|---|
| 0.0 | None | No action needed |
| 0.1-3.9 | Low | Monitor, fix in regular updates |
| 4.0-6.9 | Medium | Plan remediation |
| 7.0-8.9 | High | Fix promptly |
| 9.0-10.0 | Critical | Fix immediately |
CVSS Components:
| Metric | Description | Values |
|---|---|---|
| Base Score | Technical severity | Core vulnerability impact |
| Temporal Score | Current exploit/patch status | Changes over time |
| Environmental Score | Your specific environment | Customized to your setup |
Example CVSS Vector: CVSS:3.1/AV:N/AC:L/PR:N/UI:N/S:U/C:H/I:H/A:H
Breaking it down:
| Component | Meaning | Impact |
|---|---|---|
| AV:N | Attack Vector: Network | Remotely exploitable |
| AC:L | Attack Complexity: Low | Easy to exploit |
| PR:N | Privileges Required: None | No authentication needed |
| UI:N | User Interaction: None | No user action required |
| S:U | Scope: Unchanged | Impact limited to vulnerable component |
| C:H | Confidentiality Impact: High | Total information disclosure |
| I:H | Integrity Impact: High | Total compromise possible |
| A:H | Availability Impact: High | Total shutdown possible |
4. Results Analysis & Target Prioritization: Making Sense of the Chaos 📊🎯
After running various scans, you’ll likely have a lot of data. The real skill lies in analyzing these results and prioritizing targets and vulnerabilities. This is where your detective skills truly shine!
4.1 Interpreting Scan Output 🧐
Creating an Attack Surface Map:
First, create a service inventory. For example:
1
2
3
4
5
Host: 192.168.1.100
- Port 22: SSH (OpenSSH 7.2p2) - Potential privesc via CVE-2016-10009
- Port 80: HTTP (Apache 2.4.18) - Multiple CVEs available
- Port 445: SMB (Samba 4.3.11) - EternalBlue variant possible
- Port 3306: MySQL (5.7.12) - Authentication bypass available
Next, analyze network relationships by determining which systems can talk to each other, identifying trust relationships, and distinguishing what’s internet-facing versus internal.
Then assess authentication requirements by identifying which services require authentication, finding any anonymous access points, and checking for default credential possibilities.
Finally, perform data flow analysis to determine where sensitive data is likely stored, understand how data moves through the network, and identify critical paths.
4.2 Prioritizing Vulnerabilities and Targets 🚦
The DREAD Model (Microsoft’s threat ranking):
| Factor | Description | Weight |
|---|---|---|
| Damage | How bad would an attack be? | Consider data loss, system compromise |
| Reproducibility | How easy to reproduce? | Reliable exploit vs complex conditions |
| Exploitability | How easy to launch? | Script kiddie vs expert required |
| Affected users | How many impacted? | Single user vs entire organization |
| Discoverability | How easy to find? | Obvious vs requires deep knowledge |
Enhanced Prioritization Matrix:
| Factor | Weight | Score (1-5) | Notes |
|---|---|---|---|
| Exploitability | 30% | 5 | Public exploit available |
| Impact | 25% | 4 | Full system compromise |
| Asset Value | 20% | 5 | Database server |
| Ease of Access | 15% | 3 | Requires network access |
| Detection Difficulty | 10% | 4 | Limited logging |
Priority Score = Σ(Weight × Score)
Quick Decision Framework:
| Priority Level | Timeline | Examples |
|---|---|---|
| Immediate Action | 24-48 hours | Critical CVSS (9.0+) on internet-facing services, default credentials, unpatched RCE |
| High Priority | 1 week | High CVSS (7.0-8.9), privilege escalation, sensitive data disclosure |
| Medium Priority | 1 month | Medium CVSS (4.0-6.9), authenticated vulnerabilities, DoS vulnerabilities |
| Low Priority | Next maintenance | Low CVSS (0.1-3.9), informational findings, best practice deviations |
4.3 Creating Actionable Reports 📝
Effective Vulnerability Report Structure:
The executive summary should include critical findings count, overall risk assessment, and business impact summary.
Technical findings should detail the vulnerability title, affected systems, CVSS score, proof of concept (if safe), and remediation steps.
Include a risk matrix visualization with a heat map of vulnerabilities, timeline for remediation, and dependencies and blockers.
5. Advanced Evasion Techniques: Playing Hide and Seek with Security 👻
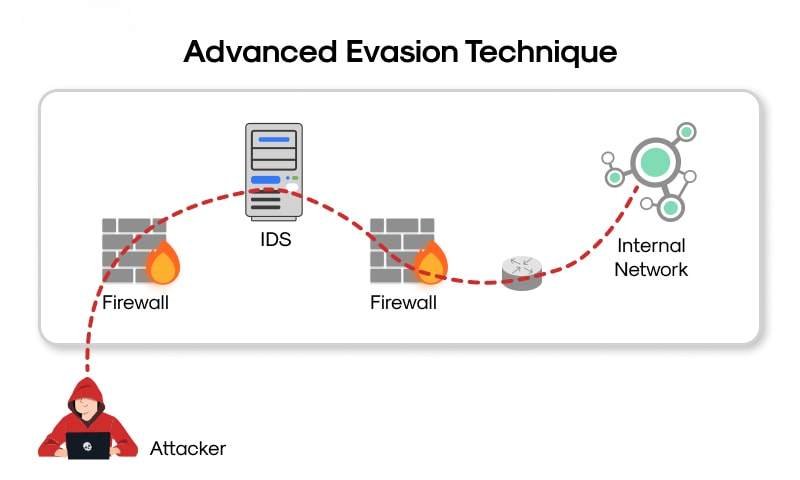
As cybersecurity professionals, we need to understand how attackers try to bypass defenses. This section briefly touches on advanced evasion techniques used to avoid detection by firewalls, Intrusion Detection Systems (IDS), and Intrusion Prevention Systems (IPS).
Important Note: These techniques should only be used in authorized penetration testing scenarios with explicit permission, as they are designed to bypass security controls.
5.1 Understanding Detection Mechanisms 🔍
Before evading, understand what you’re evading:
IDS/IPS Detection Methods:
| Method | Description | Evasion Strategy |
|---|---|---|
| Signature-based | Matches known attack patterns | Obfuscate/modify signatures |
| Anomaly-based | Detects deviations from normal | Mimic normal behavior |
| Stateful Protocol Analysis | Understands protocol states | Use protocol ambiguities |
| Heuristic/Behavioral | Identifies suspicious behaviors | Slow down, randomize actions |
Common Detection Triggers:
Port scan velocity (too many ports too fast), known exploit signatures, unusual packet crafting, volume anomalies, and geographic anomalies all trigger detection systems.
5.2 Firewall/IDS Evasion Techniques 🛡️
Timing-Based Evasion:
1
2
3
4
5
6
7
8
# Ultra-slow scan (0.5 seconds between probes)
nmap -T0 target.com

# Custom timing (even slower)
nmap --scan-delay 2s --max-retries 1 target.com

# Randomize probe timing
nmap --randomize-hosts --scan-delay 1s-5s target.com
Decoy Scanning:
1
2
3
4
5
6
7
8
# Basic decoy scan
nmap -D 192.168.1.5,192.168.1.10,ME target.com

# Advanced decoy with random IPs
nmap -D RND:10,ME target.com

# Specific decoy positioning
nmap -D 192.168.1.5,ME,192.168.1.10 target.com
Source Manipulation:
1
2
3
4
5
6
7
8
9
# Spoof source port (bypass stateless firewalls)
nmap --source-port 53 target.com  # DNS
nmap --source-port 80 target.com  # HTTP

# Spoof source IP (requires IP spoofing capability)
nmap -S 192.168.1.200 -e eth0 target.com

# Use specific network interface
nmap -e eth0 target.com
Packet Fragmentation:
1
2
3
4
5
6
7
8
9
10
11
# Fragment into 8-byte chunks
nmap -f target.com

# Fragment into 16-byte chunks
nmap -ff target.com

# Custom MTU (must be multiple of 8)
nmap --mtu 24 target.com

# Combine with other options
nmap -f -T2 -D RND:5,ME target.com
Advanced Techniques:
| Technique | Command | Purpose |
|---|---|---|
| Idle/Zombie scan | nmap -sI zombie_host target.com | Very stealthy scanning |
| FTP bounce scan | nmap -b ftp_relay_host target.com | Rare but useful |
| Bad checksum | nmap --badsum target.com | Bypass some IDS |
| Data padding | nmap --data-length 25 target.com | Confuse pattern matching |
| IP options | nmap --ip-options "L 192.168.1.1" target.com | Route manipulation |
5.3 Application-Layer Evasion 🌐
HTTP/HTTPS Evasion:
1
2
3
4
5
6
7
8
9
10
11
# Encode URL differently
GET %2f%61%64%6d%69%6e%2f HTTP/1.1  # /admin/

# Use HTTP pipelining
echo -e "GET / HTTP/1.1\r\nHost: target.com\r\n\r\nGET /admin HTTP/1.1\r\nHost: target.com\r\n\r\n" | nc target.com 80

# Fragment at application layer
curl -H "Transfer-Encoding: chunked" target.com

# Use rarely-monitored HTTP methods
curl -X PROPFIND http://target.com/
Other Application-Layer Techniques:
| Technique | Description | Tools |
|---|---|---|
| DNS Tunneling | Exfiltrate data via DNS queries | dnscat2, iodine |
| SSL/TLS Evasion | Use encryption to hide payloads | stunnel, socat |
| Domain Fronting | Hide destination behind CDN | Custom scripts |
5.4 Evasion Best Practices & Ethics 🎯
When to Use Evasion:
Client specifically requests stealth testing, testing IDS/IPS effectiveness, simulating advanced persistent threats (APTs), or during red team exercises.
Evasion Considerations:
Document all evasion techniques used, understand the increased time requirements, recognize that some evasion may trigger different alerts, and balance stealth with test completeness.
Remember: These techniques are for advanced scenarios. Always start with simpler, less evasive methods unless you have a specific reason to be stealthier (and permission to do so).
6. Practical Enumeration Workflow 🔄
Here’s a practical workflow combining all techniques:
Phase 1: Initial Reconnaissance
1
2
3
4
5
# Quick network sweep
nmap -sn 192.168.1.0/24 -oA discovery

# Basic port scan on live hosts
nmap -Pn -p- --min-rate 1000 -iL live_hosts.txt -oA full_ports
Phase 2: Service Enumeration
1
2
3
4
5
# Detailed service scan on discovered ports
nmap -sV -sC -p [discovered_ports] -iL live_hosts.txt -oA services

# OS detection on promising targets
sudo nmap -O --osscan-guess -p [discovered_ports] -iL targets.txt -oA os_detect
Phase 3: Vulnerability Identification
1
2
3
4
5
6
# NSE vulnerability scripts
nmap --script vuln -p [discovered_ports] -iL targets.txt -oA vuln_scan

# Protocol-specific enumeration
enum4linux -a [smb_targets]
nikto -h http://[web_targets]
Phase 4: Deep Dive
Run automated scanners on high-value targets, perform manual verification of interesting findings, and conduct custom enumeration based on discovered services.
Phase 5: Documentation
Create finding matrix, prioritize vulnerabilities, develop attack paths, and write recommendations.
Common Pitfalls to Avoid ⚠️
| Pitfall | Description | Prevention |
|---|---|---|
| Scanning Without Permission | Legal consequences | Always have written authorization |
| Being Too Noisy | Detection and blocking | Start subtle, escalate as needed |
| Trusting Tools Blindly | False positives waste time | Verify findings manually |
| Poor Documentation | Lost findings and evidence | Log commands and results |
| Ignoring Low-Hanging Fruit | Missing easy wins | Check defaults first |
Conclusion: Your Digital Detective Journey Continues! 🌟
Congratulations! You’ve now navigated the intricate world of Scanning & Enumeration, from mapping networks and finding live hosts to deep-diving into service details, identifying operating systems, and even getting a glimpse into automated vulnerability scanning and evasion techniques.
This phase is the backbone of any successful penetration test or security assessment. The quality of your reconnaissance, scanning, and enumeration directly impacts the effectiveness of your subsequent exploitation attempts. It’s all about gathering intelligence to make informed decisions.
Key Takeaways:
- Enumeration is about depth, not just breadth
- Combine multiple tools and techniques for accuracy
- Always verify automated findings manually
- Document everything meticulously
- Respect the scope and legal boundaries
Keep practicing these techniques in your controlled lab environments, refine your Nmap skills, and most importantly, always remember the ethical and legal boundaries. With great knowledge comes great responsibility!
What’s Next?
In our upcoming blog posts, we’ll shift gears from information gathering to the exciting phase of Vulnerability Analysis – where we’ll learn how to analyze the findings from scanning and enumeration to identify actual weaknesses. After that, it’s on to Exploitation!
Stay curious, stay ethical, and keep hacking! 💻🔥
Resources and Further Learning 📚
Continue to build your skills with these resources:
Essential Documentation
- Nmap Official Documentation: https://nmap.org/docs.html - Your comprehensive go-to guide for all Nmap features and options.
- Nmap Scripting Engine (NSE) Documentation: https://nmap.org/nsedoc/ - Explore the vast library of NSE scripts and learn how to use them effectively.
- CVE Database: https://cve.mitre.org/ - Search for known vulnerabilities by CVE ID.
- National Vulnerability Database (NVD): https://nvd.nist.gov/ - Detailed vulnerability metrics and information.
- OWASP Top 10: https://owasp.org/Top10/ - Familiarize yourself with the most critical web application security risks.
Practice Platforms
- VulnHub: https://www.vulnhub.com/ - Free vulnerable VMs for practice
- HackTheBox: https://www.hackthebox.com/ - Online penetration testing platform
- TryHackMe: https://tryhackme.com/ - Guided learning paths with hands-on rooms
- PentesterLab: https://pentesterlab.com/ - Web application security exercises
- DVWA (Damn Vulnerable Web Application): Practice web app enumeration locally
- Metasploitable: Intentionally vulnerable Linux distribution
Recommended Tools to Master
- Enumeration Tools:
- Nmap (master all features)
- Masscan (faster alternative for large scans)
- Enum4linux (SMB enumeration)
- DNSrecon (DNS enumeration)
- Gobuster/Dirb (directory brute-forcing)
- Vulnerability Scanners:
- OpenVAS/GVM
- Nessus Essentials
- Nikto (web servers)
- WPScan (WordPress)
- SQLMap (SQL injection)
Books & Courses
- “Nmap Network Exploration and Security Auditing Cookbook” by Paulino Calderon
- “The Web Application Hacker’s Handbook” by Dafydd Stuttard & Marcus Pinto
- “Network Security Assessment” by Chris McNab
- OSCP (Offensive Security Certified Professional) certification prep materials
- eLearnSecurity courses for practical penetration testing
Community Resources
- r/netsec - Network security subreddit
- SANS Reading Room - Free security papers
- Packet Storm Security - Security tools and exploits
- Security Focus - Vulnerability database and discussions
- Twitter Security Community - Follow researchers and stay updated
Legal Testing Targets
Always remember to obtain explicit permission before scanning any systems you don’t own. Safe practice targets include:
scanme.nmap.org- The official Nmap test server- Your own lab environment using virtualization (VirtualBox, VMware)
- Cloud instances you own (AWS, Azure, DigitalOcean)
- Bug bounty programs with defined scopes:
- HackerOne
- Bugcrowd
- Synack
- Intigriti
Quick Reference Cheat Sheets
Create or download cheat sheets for:
- Common Nmap commands
- NSE script categories
- Service default ports
- OS fingerprinting indicators
- CVSS scoring guide
- Common vulnerability types
Final Tips for Success 🎯
- Build Your Lab: Create a home lab with vulnerable VMs to practice safely
- Document Everything: Keep detailed notes of your commands and findings
- Automate Wisely: Learn to script repetitive tasks but understand what they do
- Stay Updated: Follow security news and new vulnerability disclosures
- Network: Join local security groups and online communities
- Practice Ethically: Always stay within legal boundaries and obtain permission
- Learn Continuously: Cybersecurity evolves rapidly; never stop learning
Remember: The difference between a criminal hacker and an ethical hacker is permission and intent. Always be on the right side of the law!
Disclaimer: The techniques discussed in this blog post are for educational purposes only and should only be used in authorized, controlled environments. Unauthorized access or scanning of computer systems is illegal and unethical. Always ensure you have explicit written permission before testing any systems you do not own. The author and publisher assume no liability for misuse of this information.